Mid Thigh Pull: The Complete Protocol and Rehab Guide
Evaluating raw human force production has long challenged coaches, sports scientists, and physical therapists. Traditional one repetition maximum tests such as the barbell back squat or conventional deadlift provide insight into heavy load handling, but they carry substantial systemic fatigue, elevate musculoskeletal strain, and demand seasoned lifting technique. Most importantly, dynamic tests fail to reveal how fast an athlete produces tension. The isometric mid thigh pull has solved these long-standing evaluation challenges across elite weight rooms and sports medicine clinics.
By demanding an all out overcoming contraction against an immovable bar, this multi-joint assessment unlocks an unfiltered window into the neuromuscular system. Whether you are benchmarking collegiate sprinters, monitoring neuromuscular fatigue over a competitive season, or managing an anterior cruciate ligament rehabilitation protocol, this static evaluation bridges laboratory biomechanics with practical training decisions.
What is the Isometric Mid Thigh Pull Test?
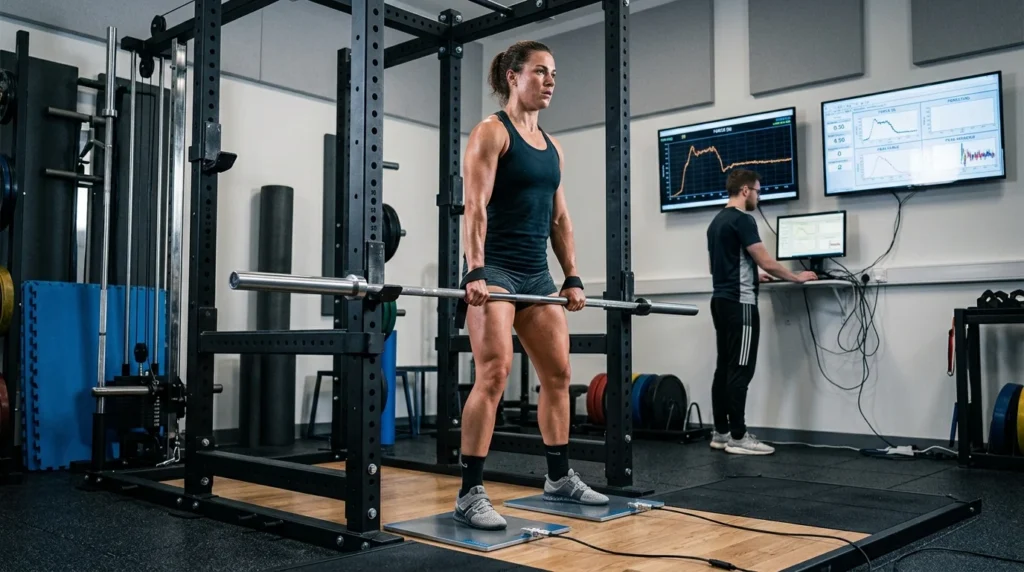
The isometric mid thigh pull is an isometric assessment where an individual pulls upward against a rigid, unyielding barbell positioned across the upper legs while standing on precision measurement instruments. Rather than moving a barbell through space, the individual drives their lower body into the ground with maximal intent for a predetermined window of time, typically lasting between one and five seconds.
Moving Beyond Dynamic One Repetition Maximum Testing
Dynamic strength assessments are often limited by technique, pacing, and joint sticking points. A failed deadlift frequently occurs because of bar drift or back rounding rather than a pure lack of lower limb force capacity. In contrast, the mid thigh pull removes movement technique from the equation. Because the joints remain at fixed angles throughout the effort, the assessment isolates genuine neuromuscular recruitment. Practitioners can measure absolute peak force production without the delayed onset muscle soreness or injury risks that follow heavy eccentric dynamic testing.
Biomechanical Significance of the Second Pull Position
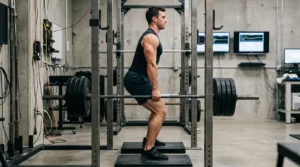
The posture selected for the mid thigh pull is deliberate. It mimics the second pull phase of the clean or snatch in Olympic weightlifting, often referred to as the power position. Biomechanically, this upright, slightly hinged position aligns the hip and knee extensors to produce the greatest multi joint ground reaction forces possible. Maximum force exerted during this phase directly correlates with explosive performance markers, including horizontal sprint acceleration, change of direction speeds, and countermovement jump heights.
Equipment Setup and Hardware Architecture
High-quality assessment data begins with the testing setup. Inconsistent equipment arrangements introduce noise into force readings, leading to poor coaching and clinical decisions.
Force Plates, Load Cells, and Sampling Rates
Dual wireless force plates represent the gold standard for testing. When force plates are used, the system samples ground reaction forces at a minimum frequency of 1000 Hz. A 1000 Hz sampling rate means the plate records one thousand individual force values every single second, which is essential for capturing accurate early phase force development.
Portable tension dynamometers or digital load cells present a practical mid thigh pull alternative for low-resource settings. While dynamometers measure tensile force pulled on the bar rather than true vertical ground reaction forces, they still offer valuable isometric strength test data for traveling teams and regional physiotherapy clinics.
Securing the Rig and Eliminating Bar Deflection
A major source of measurement error is bar elasticity. Standard Olympic barbells flex and store elastic energy when loaded with high tensile forces. This oscillation corrupts the early segment of the force-time curve. To prevent this, testing must use an immovable power bar, a reinforced thick bar, or a dedicated isometric testing rig.
If you are setting up in a standard power rack, ensure the bar is bolted firmly or positioned tightly beneath solid safety pins. Reinforce the setup with heavy tie-down straps or non-elastic chains to eliminate mechanical give.
Standardized Step-by-Step Testing Protocol
Standardizing every element of the assessment ensures that changes in force outputs reflect actual physiological adaptations rather than postural variations.
Establishing Optimal Joint Angles
The athlete must stand with a self-selected stance roughly shoulder width apart, identical to their clean or vertical jump setup. Standardizing the bar height directly controls joint angles:
-
Knee Angle: 125 degrees to 145 degrees of flexion
-
Hip Angle: 140 degrees to 150 degrees of flexion
-
Torso: Near upright with the shoulders stacked directly over or slightly behind the barbell
-
Bar Placement: Positioned against the upper thigh, midway between the superior border of the patella and the inguinal fold
Use a manual goniometer or digital inclinometer to confirm these angles during the athlete’s first baseline session. Record the bar height hole number on the rack so that every subsequent test maintains identical geometry.
Grip Standardization and Strap Implementation
Grip strength must never serve as the limiting factor when assessing lower body neuromuscular capacity. Research demonstrates that bare hands frequently slip or fatigue before the lower body hits true peak force. For research and formal testing, wrap lifting straps around the bar and tape the hands securely to the steel. In rapid team testing scenarios where taping is impractical, an alternating overhand and underhand grip with straps provides an acceptable substitute, provided the lifter standardizes their hand placement across testing dates.
The Quiet Baseline Phase and Removing Slack
Before starting the maximal effort, the athlete must step onto the plates and stand motionless for a quiet period of two to three seconds. This interval allows the force plate software to calculate the total system weight.
Next, the lifter must carefully remove all mechanical slack from the bar and straps without pre-tensioning their musculature. If the athlete dips down or initiates a rapid countermovement drop before pulling, the trial is invalid. This countermovement activates the stretch-shortening cycle, artificially inflating the force output while destroying early baseline readings.
Verbal Cues and Contraction Duration
Verbal coaching cues dramatically alter force production. Instructing an athlete to pull up on the bar prompts excessive upper body recruitment and reduces ground reaction forces. Instead, deliver this specific cue: Push the floor away through your midfoot as fast and as hard as possible.
Traditional research protocols advocate a duration of three to five seconds to capture peak force production. However, contemporary sports science shows that a brief one-second protocol yields virtually identical peak force values while producing far less central nervous system fatigue during demanding competition phases.
Decoding the Force Time Curve and Core Metrics
The line plotted across the force-time curve holds much deeper diagnostic value than a single peak force number.
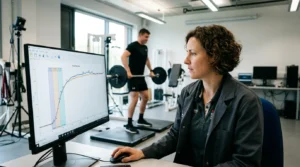
Absolute Force Versus Net Peak Force
Absolute peak force represents the highest total force recorded by the plates, inclusive of the athlete’s body weight. To assess genuine muscular capabilities, software programs subtract system weight to reveal net peak force. Dividing net force by the athlete’s body mass yields relative peak force, expressed in Newtons per kilogram or as a multiple of body weight. Relative values allow coaches to compare a lightweight gymnast directly against a heavyweight lineman.
Rate of Force Development Across Critical Time Bands
Rate of force development measures the speed at which the neuromuscular system produces force from a static start. While reaching absolute peak force can take between 300 and 500 milliseconds, crucial sporting actions such as sprinting ground contacts and reactive agility cuts occur within 80 to 200 milliseconds.
Sports scientists evaluate force outputs across discrete time windows:
-
Zero to 50 Milliseconds: Governed by intrinsic muscle stiffness and initial motor unit firing rates
-
Zero to 100 Milliseconds: Closely tied to early acceleration and quick reactive contacts
-
Zero to 200 Milliseconds: Reflects maximal voluntary motor unit recruitment and dynamic jump power
Impulse calculated across these early windows serves as a reliable performance metric, as it accounts for the total mechanical work performed within realistic sporting timeframes.
The Dynamic Strength Index
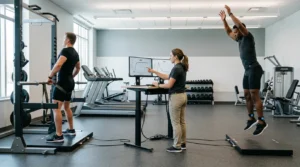
Pairing the mid thigh pull with a countermovement jump allows coaches to calculate the Dynamic Strength Index. This metric divides countermovement jump peak force by isometric peak force. A low score indicates that an athlete has sufficient raw strength but lacks explosive power and ballistic qualities, highlighting a need for plyometrics and velocity-based training. Conversely, a high score close to 1.0 indicates that the athlete utilizes their available strength efficiently, signaling that traditional heavy strength training is needed to raise the raw force ceiling.
Comprehensive Normative Data Benchmarks
To interpret where an individual sits within athletic and general populations, practitioners rely on normalized relative strength values expressed as multiples of body weight.
| Population Cohort | Relative Peak Force Range | Neuromuscular Profile | Suggested Training Focus |
| Elite Weightlifters and Powerlifters | 3.5 to 4.5+ times body weight | Exceptional maximum force ceiling | Rate of force development, ballistic speed |
| Professional and Collegiate Field Athletes | 2.8 to 3.8 times body weight | High force with fast motor recruitment | Sport specific power conversion |
| Trained General Adults (18 to 35 Years) | 2.5 to 3.5 times body weight | Solid foundational strength | Progressive barbell overload |
| Untrained General Adults | 1.8 to 2.4 times body weight | Moderate voluntary muscle activation | General resistance training foundations |
| Youth Athletes (Under 18 Years) | 1.5 to 2.5 times body weight | Developing coordination and strength | Movement literacy, light resistance work |
| Masters Adults (50+ Years) | 1.2 to 2.0 times body weight | Declining high-threshold motor units | Sarcopenia prevention, isometric loading |
Clinical Applications and Return to Play Frameworks
The controlled, stationary nature of isometric assessments makes them exceptionally valuable for clinical rehabilitation. Traditional manual muscle testing relies on subjective therapist resistance, whereas stationary testing on dual plates delivers objective, unalterable data.
Identifying Bilateral Force Asymmetries
Dual force plate setups isolate left limb force from right limb force during the mid thigh pull. In healthy, uninjured populations, bilateral limb differences remain under 10 percent. When an athlete recovers from an orthopedic injury, such as an anterior cruciate ligament reconstruction or Achilles tendon repair, the injured limb often displays hidden force production deficits.
A limb asymmetry exceeding 15 percent signals compensatory unloading, even if the athlete demonstrates full movement range and displays zero outward limp during dynamic hopping drills. Clinicians monitor early rate of force development recovery alongside peak force, as rapid force production is almost always the final quality to return after long periods of joint immobilization.
Unilateral Single Leg Assessments
To remove compensation mechanisms entirely, clinicians frequently utilize a unilateral single-leg mid-thigh pull variation. By placing one foot on the platform with the knee slightly flexed, the individual drives upward while the non-testing leg hangs unloaded. This single limb setup isolates hip, knee, and ankle extensor capacity without allowing the dominant limb to mask deficits on the recovering side.
Troubleshooting Common Testing Errors
Recognizing faulty trials preserves data integrity and prevents skewed training recommendations.
-
The Countermovement Drop: When an athlete quickly flexes their knees and dips their hips right before pulling, the force curve drops below the quiet baseline before spiking. Discard this trial immediately, as it introduces stretch reflex benefits.
-
Premature Tensioning: If the athlete pulls on the bar during the quiet stabilization period, the software sets an incorrect baseline weight. This artificial elevation leads to inaccurate net force and corrupted early time band calculations.
-
Excessive Trunk Arching: Athletes struggling with lower body drive often hyperextend their lower backs or lean back excessively. Re-cue the lifter to push directly down through the floor rather than tilting back against the bar.
-
Off-Axis Force Application: Any forward or lateral shifting directs force outside the vertical plane. Make sure the barbell remains firmly pinned, the feet stay flat, and the vector of intent points straight down into the platform.
Standardizing every repetition guarantees that the data collected from this assessment serves as a reliable guide for programming, athletic development, and injury rehabilitation over time.